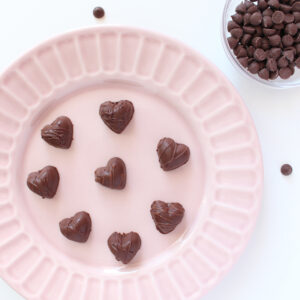
Vegan Chocolate Hearts
These delectable dairy-free chocolate hearts are super easy to make and are the perfect sweet treat for Valentine's Day or any other time of year!
Ingredients
Chocolate Hearts
- 1 ½ cups *dairy-free semi-sweet chocolate chips (you could also use a bar of dairy-free chocolate as well)
- 1 tsp coconut oil
- pinch of sea salt
Equipment
- small-medium stainless steel bowl (or heatproof glass bowl)
- small saucepan
- silicone spatula (large metal spoon)
- silicone heart-shaped chocolate molds
- metal spoons
- parchment paper
- plate (or a baking tray)
- oven mitts
Instructions
CHOCOLATE MAKING
Melting the Chocolate (Double Boiler)
- Fill your saucepan with 1-2 inches of water and place it on the stove. Place the stainless steel bowl on top of the saucepan — the two should sit tightly together. You don't want a gap as heat will escape. You also want to make sure the bowl does not touch the water, as it may burn the chocolate. Turn up the heat to high.
- Once you hear the water start to boil, add the coconut oil.
- After the oil is melted down (after 1-2 minutes) add the chocolate chips. Stir the chocolate constantly with your silicone spatula or spoon to help melt the chocolate. At this point in time add the pinch of sea salt. You may wonder why sea salt? It helps to bring out the chocolatey goodness!
- Once you see the chocolate starting to melt down to a liquid consistency, cut the heat and remove it from the double boiler. It's fine if it's not all melted down, the residual heat from the bowl will help melt it all down. Once melted down, the chocolate should be a nice liquid-syrup consistency with a nice glossy sheen that slowly drips off your spatula or spoon. Let it cool down for 2-3 minutes.
Filling the Molds
- It's now time to fill the molds. I like using silicone molds as I find the chocolates come out effortlessly, but you could use a plastic mold as well. Place the mold on a plate or tray, for easier transfer to the fridge or freezer and to catch any spills.
- Take a spoonful of the chocolate and slowly start filling up the molds. Don't worry if it drips all over the place, it's all a part of the fun. Fill it as close to the top as possible.
- Once all the molds are filled, place them in the fridge or freezer. Set the remaining chocolate aside, we will be using it later. If placing in the fridge, it will take about 40-50 minutes and the freezer 20-30 minutes. Shake the tray gently to see if it's set if it moves it's not ready, just place it back and let it set a little longer till they are firm.
Removing from the Molds
- Once the chocolates are set it is time to remove them from the molds! Have a plate or tray covered with some parchment ready to go as that is where we will be placing the chocolates. Press your thumb behind the shape and gently press the chocolates out and bend the molds as necessary. It should come out easily. Now if you want to taste test a couple, I would highly recommend doing that, for quality assurance of course ;).
- At this point they are done and you can place the chocolates in a tin, or airtight container to store away OR feel to enjoy them straight away, but if you want to take these chocolates one step further, then let us continue on.
Decorating (optional)
- Now, comes the most fun part of the chocolate-making process, decorating! Place all the chocolate hearts on the parchment paper, make sure to have them spaced away from one another. Then let's bring back our melted chocolate, it's time to bring out the artist in you. Drizzle the melted chocolate over the chocolates, whatever way your heart desires. It can get a bit messy and you may get some on you as well, but it is all part of the fun. You could even put sprinkles on top too if you wanted to take them even a step further. Once you are done place the chocolates back in the fridge or freezer to set. Once they are set, take them out and enjoy!
Notes
* I used Camino Semi-Sweet Chocolate Chips as they are the ones I personally love but feel free to use whatever ones you like.
** This recipe makes 30 chocolates (2 chocolate heart molds)
*** Store in the fridge for a week in an airtight container or tin. Store in the freezer for 1-2 months in an airtight container, but that is if they last that long.
NOTE: Sometimes the chocolate may start to thicken up if too much time has passed, not to fret. Just place the bowl back on the double boiler, and melt the chocolate down again.
MELTED CHOCOLATE: You may have some leftover melted chocolate after everything is said and done. You could just eat the rest with the spoon, that is a totally fine option. However, to ensure you use every last drop, I have a suggestion. Heat up a cup of dairy-free milk (or milk of choice) and add the chocolate, mix it up and bring it to a low boil, cut the heat and pour into your favourite mug, you now have yourself a mug of hot chocolate!